LFO is an abbreviation for “low frequency oscillator.” Modulation refers to the way one signal is changed systematically by another signal. Consequently, LFO modulation refers to the process by which an oscillator using a low frequency (usually below the threshold of human hearing, 1 – 20 Hz) can systematically change the state of another oscillator, for example, its frequency.
Using the patch you created in the 1st tutorial (Creating a Simple SYD Patch), the following tutorial will show you how to use an LFO (low frequency oscillator) to modulate the frequency of the original sine wave operator. Systematic modulation of the frequency by a rate less than about 20 Hz (the optimum rate is 7 Hz) is also referred to as VIBRATO. Vibrato is the effect which is created when a string play “wiggles” the left hand on the finger board. It is also the effect that is characteristic of opera singers in the European tradition.
Do this:
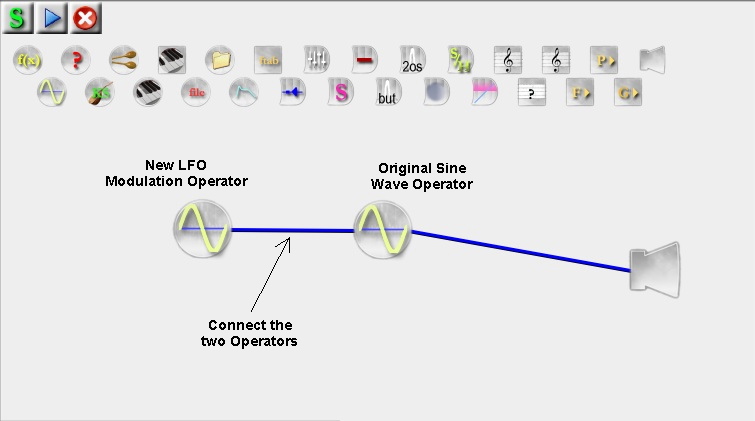
Open the LFO Modulation of the Amplitude patch you created in the last tutorial. It should look like this (except it won’t have the comment and arrows):
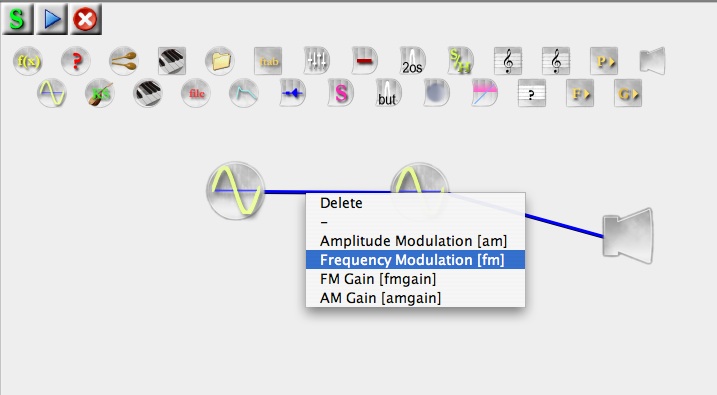
Move the cursor over the link you have made between the two oscillators until the cursor changes to a PEN (instead of a finger pointing).
Hold down the CONTROL KEY and click on the connection until you get a pop-up menu.
Select the “Frequency Modulation (fm)” option:
Note how the BLUE connection line changes to a GREEN connection line. This color coding is designed to alert you to the different types of connections, AM (amplitude modulation=blue) and FM (frequency modulation=green).
Select the original sine wave operator (the one on the right) and change the frequency field so that it contains the value, 440+fm (see below):
Also, change the value in the Amplitude field to .5 (be sure it’s 5 TENTHS and not 5).
Now select the LFO modulation oscillator operator (the one on the left) and change the various parameter fields so they contain these values:
Note the value of 10 (!) in the amplitude field. Don’t worry, this is the correct value. This value of 10 is not the output amplitude but is the amount of modulation which will be added to the frequency in the original Oscillator operator. Later, you can experiment with changing this value to various amounts in order to discover how that will affect the sound.
Click OK and close this window.
Click the “Synthesize” button located in the bottom top corner of the patch window. You will not hear the sound of the patch until you “synthesize” it.
Make sure your headphones are connected to the audio output of the computer.
When you are ready to proceed, click the “Play” button located in the top left corner of the patch window. You should hear the sine wave play in your headphones and hear a definite modulation of the frequency corresponding to the 2 Hz frequency of the modulation oscillator. The depth (amount) of the modulation will be represented by the wide variation of the frequency. Or, click the link below to hear sound:


